In This Article
- What’s actually in your tap water
- How to check your local water quality (free tool)
- Why reverse osmosis is the only real solution for fluoride
- Best under-sink RO systems
- Best RO for RVs and low pressure
- How to measure your water quality
- Remineralization filters (5th/6th stage)
- Best shower filters (and why your skin cares)
- My exact setup at home
What’s Actually in Your Tap Water
So you got rid of the seed oils. Tossed the Teflon. Started reading ingredient labels at the grocery store like someone studying for an exam. All great moves. But be honest: when’s the last time you thought about what’s coming out of your kitchen faucet? Because I sure didn’t. Not for years.
I had the whole clean eating thing figured out. Organic this, grass-fed that, supplements lined up on the counter like a little pharmacy. Spending real money on all of it. And the whole time, the water I was cooking with, making my morning coffee with, gulping down all day long? Unfiltered city tap water. The irony didn’t hit me until way later than it should have.
Here’s the thing about municipal tap water. It meets EPA standards. Great. Except the EPA sets legal limits, not health limits. Big difference. “Legal” just means your city won’t get fined. It doesn’t mean the water is doing your body any favors. Stuff can be technically within legal limits and still build up in your tissues over years and years.
Let me run through what’s likely coming out of your faucet right now.
Chlorine and chloramines. Water treatment plants add these to kill bacteria, which, fair enough, that’s a legitimate reason. Problem is, chlorine doesn’t just disappear after it does its job. It hangs around in the pipes, reacts with organic gunk in there, and creates byproducts called trihalomethanes. Some of those byproducts? The EPA labels them probable carcinogens. That swimming pool taste your tap water sometimes has is the chlorine, and the health concerns go beyond the bad flavor.
Fluoride. Yeah, this one gets people fired up. I get it. The argument for adding it to water is cavity prevention, and that’s been the official line for decades. But fluoride accumulates. It builds up in your bones over time. There’s research connecting it to thyroid disruption at the concentrations certain municipalities use. Beyond that, the health concerns go further than most people realize. A Harvard meta-analysis of 27 studies found that children in high-fluoride areas showed significantly lower IQ scores[1]. A larger 2024 review of 59 studies confirmed it: IQ decreased by 1.63 points per 1 mg/L increase in urinary fluoride, with kids being hit hardest[2]. And then there’s the pineal gland, which research shows accumulates fluoride at higher concentrations than bone tissue. The pineal gland produces melatonin (your sleep hormone), and calcification of the gland from fluoride deposits has been linked to disrupted melatonin production[3]. You can decide for yourself whether you want it in your body, but here’s what matters for this article: almost no consumer filter removes fluoride. Not Brita. Not those faucet attachments. Not the pitcher your roommate bought at Target. Reverse osmosis is the only thing at the consumer level that actually strips fluoride out of water. That’s not my opinion. That’s chemistry.
Lead. It’s 2026 and lead in drinking water is still a thing. Aging pipes, old solder joints, neglected infrastructure across the country. Lead leaches into the water supply and the scary part is there’s no threshold that toxicologists consider safe. Not “a little is fine.” Zero. Children are the most vulnerable. Homes built before 1986 are the highest risk because that’s when lead solder got banned for plumbing.
PFAS (forever chemicals). You’ve probably heard this term by now. PFAS is a family of synthetic chemicals used in non-stick coatings, waterproof fabrics, fast food packaging, firefighting foam, all kinds of industrial stuff. They earned the “forever” nickname because they genuinely do not break down. Not in soil, not in water, not in your bloodstream. Once PFAS gets into a water supply, it stays. The EPA has started to crack down on a handful of PFAS compounds, but the reality is most local water systems are way behind on testing. And the research linking PFAS to immune problems, hormonal disruption, and cancer risk just keeps piling up.
Pharmaceuticals and farm runoff. Antibiotics, birth control hormones, pesticides, herbicides. Tiny amounts show up in water samples all over the country. Treatment plants were never built to filter this stuff out. Each individual dose is small, sure. But you’re getting a little bit every single day, compounding over years. Nobody really knows what that does long term.
None of this stuff will land you in the hospital tomorrow morning. That’s not the concern. The concern is what happens when you drink this water every day for ten, twenty, thirty years. Here’s a way to think about it: if you’re not filtering your water, your body is. Your kidneys, your liver, your gut lining, they’re processing every contaminant that comes through the tap. And if you’ve already gone through the trouble of cleaning up your food and your kitchen, it seems kind of silly to leave your water as the one thing still making your body work overtime.
Step One: Check What’s in Your Local Water
Before you spend a dollar on any filter, go look up your actual tap water. The Environmental Working Group has this free tool where you punch in your zip code and it shows you everything that was detected in your local supply. Real data from real utility tests. And here’s what makes it useful: it compares those results against health guidelines, not just the legal limits (which are way more generous, as we just discussed).
When I plugged in my own zip code, the report came back with 12 contaminants above health guidelines. Twelve. And my water was 100% legal. Passed every regulatory check. That was my wake-up call. I threw out the Brita and started researching real filtration.
One thing to look for specifically: does your report list fluoride in the “contaminants detected” section? Because if it does, your options narrow down fast. Carbon filters don’t touch fluoride. Ceramic filters don’t touch it. Pitcher filters, faucet attachments, none of that works on fluoride. The only technology available to regular consumers that actually pulls fluoride out of water is reverse osmosis. Full stop. That’s just how the chemistry works.
Why Reverse Osmosis (and Why Pitchers Don’t Cut It)
Not going to bore you with a breakdown of every filter type on the market. Most of them look promising on the box and disappoint once you actually test what they remove. Quick rundown:
Pitcher filters (Brita, PUR, etc.): Taste improvement, basically. The carbon inside absorbs chlorine flavor and that’s about where the magic stops. Fluoride passes right through. PFAS passes right through. Same with pharmaceuticals and microplastics. Oh, and those cartridges that need replacing every 8 weeks? The per-gallon math is ugly once you actually do it.
Faucet-mount filters: A pitcher filter bolted to your faucet. Little more convenient to use, exact same limitations in terms of what actually gets filtered out.
Whole-house carbon filters: These are legitimately good at one specific thing: removing chlorine from every water source in your home, showers included. Where they fall short is the hard stuff. Fluoride, heavy metals, PFAS, those slip through with inconsistent results. Also a non-starter if you rent. You’d need access to the main water line coming into the building, and unless you own the place, that’s not happening.
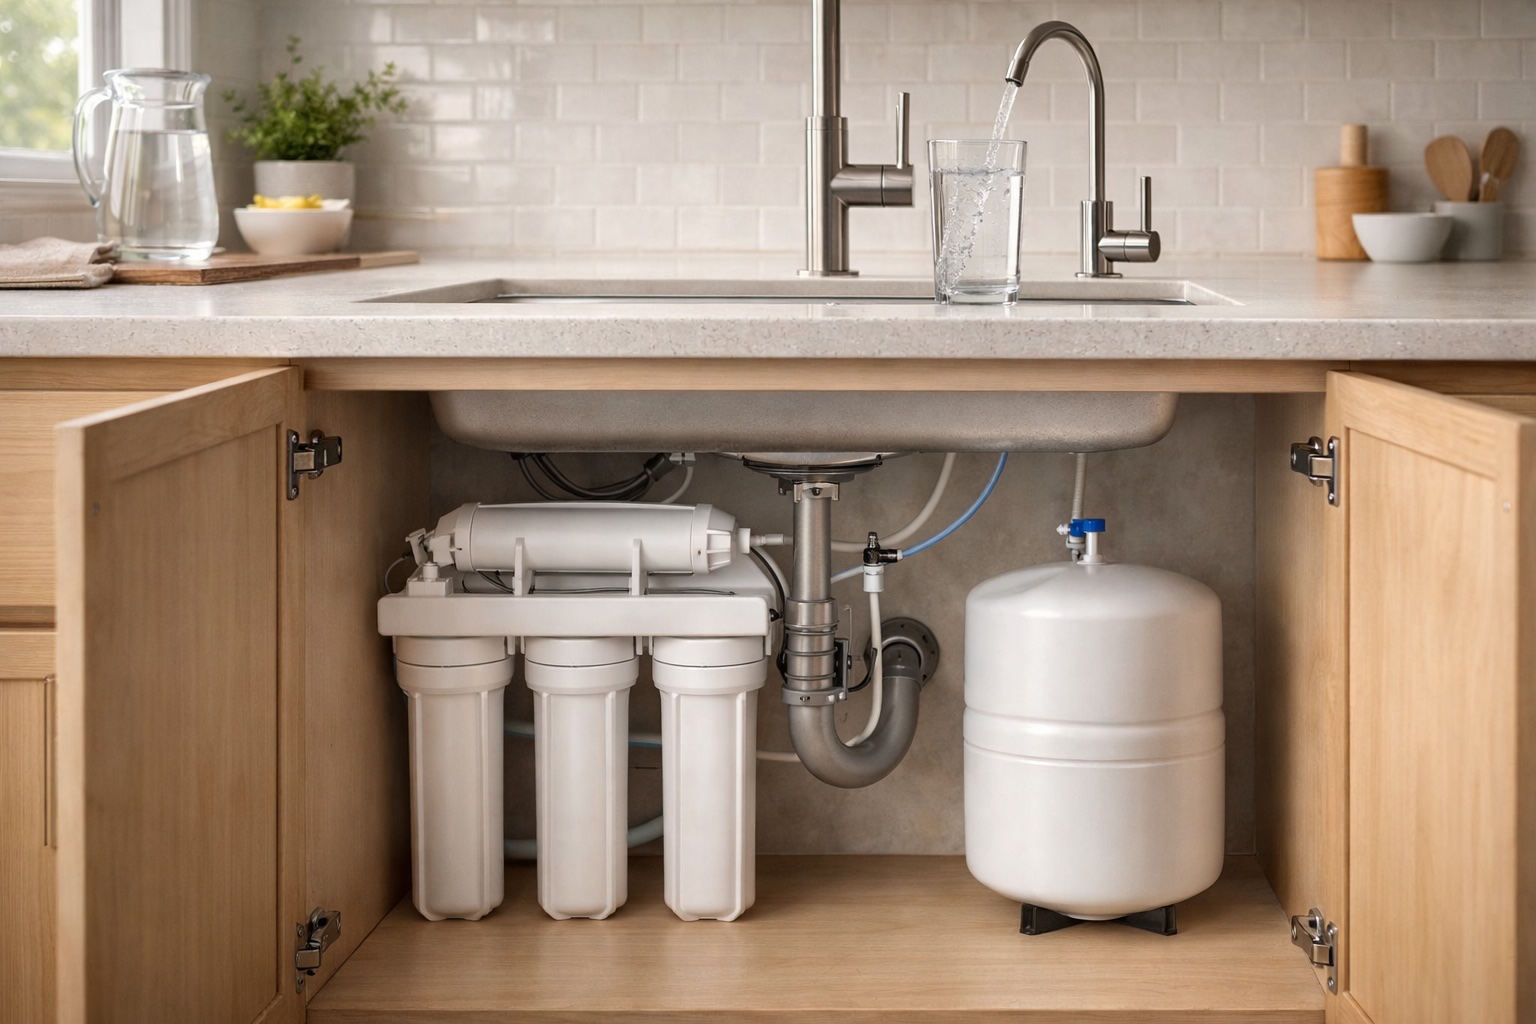
Reverse osmosis: The real deal. Pushes water through a semi-permeable membrane at serious pressure. That membrane catches fluoride, lead, PFAS, chlorine, pharmaceuticals, microplastics, bacteria. Basically everything you don’t want. No other consumer-grade filter comes close to this level of removal. And once you install it, it’s essentially set it and forget it. Change the filters on schedule, and you’ve got clean water 24/7 without thinking about it. Yes, you’ll need to drill a small hole in your sink for the dedicated faucet. But if you’re renting and worried about leaving a hole behind, a stainless steel sink hole cap (~$11) plugs it right up when you move out. Problem solved.
Two objections always come up with RO. “It wastes water.” Yes, older tank systems used about 3 gallons of water to make 1 gallon of clean water. Not ideal. But the newer tankless models (like the Waterdrop below) have brought that ratio down to around 2:1 or 1.5:1. Much more reasonable. The other objection: “It removes the minerals too.” Also technically true. But let’s be real, the mineral content of tap water is negligible next to what you get from eating actual food. One banana has more potassium than a gallon of tap water. If it still concerns you, add a remineralization stage. Most systems offer one as a cheap add-on.
Best Under-Sink RO Systems
I went through a bunch of these. The three I landed on cover a range of budgets and they all get the important stuff done: fluoride, lead, PFAS, chlorine, gone.
APEC ROES-50 (What I Actually Use)
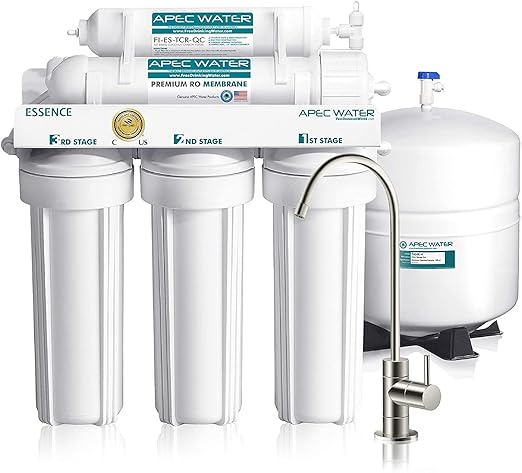
Full disclosure: I’ve been running APEC systems for about ten years now. This is the brand I personally trust and keep going back to. The ROES-50 is their 5-stage workhorse. WQA Gold Seal certified, which is a tougher standard than basic NSF (more rigorous independent testing). Made in the USA. 50 gallons per day. The build quality feels notably more solid than cheaper options, and their tech support will actually walk you through problems over the phone.
Removes: All the big ones. Fluoride, lead, chlorine, PFAS, arsenic, chromium, bacteria, viruses. Up to 99% contaminant removal.
Price: Around $200. Yearly filter cost about $40-60.
My take: The maintenance is dead simple once you know the rhythm. I swap out the three core filters (sediment, carbon, carbon block) once a year. The RO membrane itself only needs replacing every 2-3 years. Replacement filters are inexpensive and widely available. After a decade with APEC, I’ve never had a failure, never had a leak, never had a reason to try something else. If you want an under-sink system you can install once and just maintain cheaply for years, this is the one.
iSpring RCC7 (Best Value)
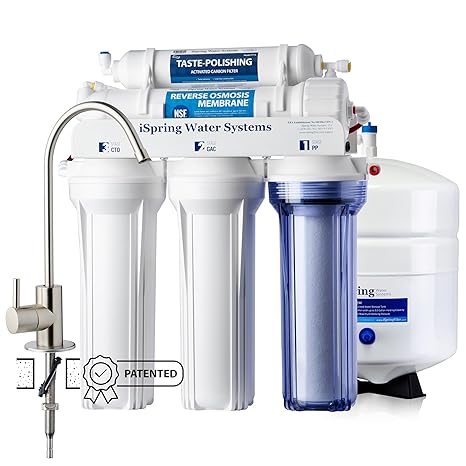
Five stages of filtration: sediment, granular carbon, carbon block, the RO membrane itself, and a final carbon polish. Comes with a storage tank. 75 gallons per day capacity, which is plenty for most households. NSF certified. The install isn’t bad if you’ve ever done basic stuff under a sink before. Most people get it done in about an hour.
Removes: Fluoride, lead, chlorine, arsenic, PFAS, microplastics, bacteria, and over 1,000 other contaminants.
Price: Around $187. Replacement filters run about $30-50 per year.
My take: This is the one I’d tell a friend to buy if they asked me “what should I get?” Thousands of reviews on Amazon, 4.7 star average, replacement filters are cheap and available everywhere. iSpring has been making these for a while and they’ve got it dialed in. Hard to beat for the money.
Waterdrop G3P600 (Premium Tankless)
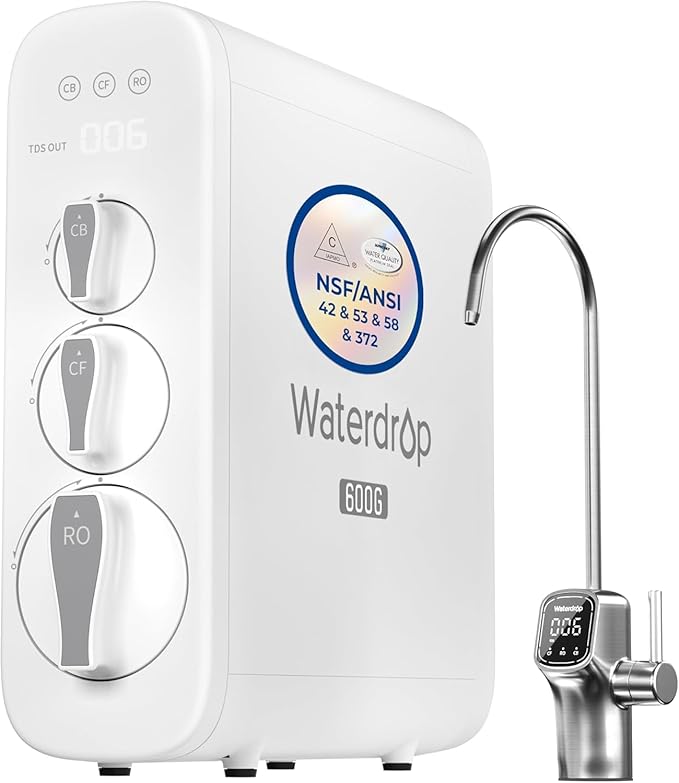
Different approach entirely. No storage tank, which is a big deal if your under-sink cabinet is already crammed full. Eight filtration stages. 600 gallons per day (way more than you’ll ever need). The water-to-waste ratio is around 2:1, much better than old-school tank systems. It’s got NSF/ANSI 42, 53, 58, and 372 certifications. The faucet has a little LED display that shows your filter life in real time, which is a nice touch.
Removes: Everything the tank systems get, plus some models add UV sterilization. Fluoride, PFAS, lead, chlorine, pharmaceuticals, microplastics.
Price: Around $399. Filter replacements are pricier too, roughly $60-100 per year.
My take: The premium choice. You’re paying double the iSpring, but you get a slim profile that fits in tight spaces, faster water flow, and less waste. If you’re in a small apartment kitchen or you just want the latest technology, this is worth the extra cost. The tankless design is genuinely great.
| System | Stages | Capacity | Tank | Certification | Price |
|---|---|---|---|---|---|
| APEC ROES-50 | 5 | 50 GPD | Yes | WQA Gold Seal | ~$200 |
| iSpring RCC7 | 5 | 75 GPD | Yes | NSF | ~$187 |
| Waterdrop G3P600 | 8 | 600 GPD | No (tankless) | NSF 42/53/58/372 | ~$399 |
| SimPure T1-400UV | 8 + UV | 400 GPD | No (tankless, built-in pump) | NSF/ANSI 58 | ~$206-226 |
Bonus Pick: Best RO for RVs and Low-Pressure Water
If you live in an RV or travel in one part-time, you’ve got a different problem. Most RO systems need decent water pressure to push water through the membrane. Campground hookups and well systems don’t always deliver that. You need a unit with a built-in pump.
SimPure T1-400UV (Best for RV / Low Pressure)
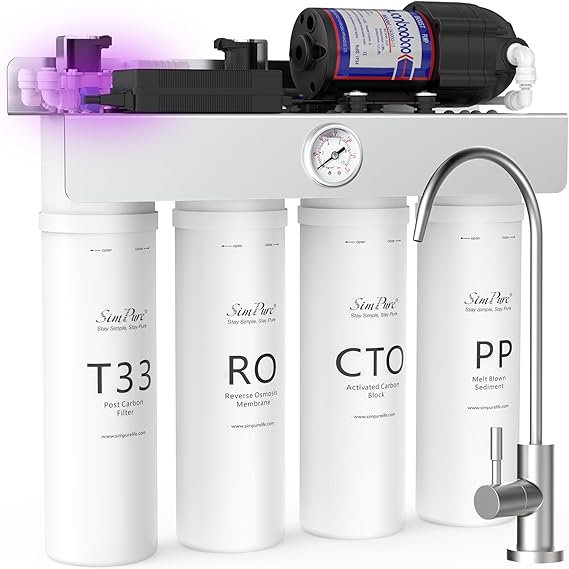
This one solved the pressure problem for me. It has an internal pump that boosts low-pressure water up to the level needed for proper RO filtration, so it works on demand even when your water source is weak. Eight stages of filtration plus UV sterilization. Tankless design. 400 GPD capacity and a 1.5:1 pure-to-drain ratio, which is about as efficient as consumer RO gets right now. NSF/ANSI 58 certified.
Removes: Fluoride, PFAS, lead, chlorine, bacteria, viruses. Near 0 TDS output.
Price: Around $206-226. Filter replacements are quick-change twist cartridges.
My take: The twist-on filter changes are a huge quality-of-life upgrade over older systems where you need a wrench and 20 minutes. For part-time RV use, here’s a tip: when you’re done with a trip, pull the filters out, put them in a plastic bag, and store them in your fridge. Keeps bacteria from growing in the filters while they sit unused. When you head out again, pop them back in. Works perfectly.
Measure Your Water Quality: TDS Meters
Once you have an RO system running, you’ll want to verify it’s actually doing its job. That’s where a TDS meter comes in. TDS stands for Total Dissolved Solids, basically a count of everything dissolved in your water. Tap water usually reads somewhere between 150-500+ ppm. Good RO output should be under 25 ppm, often close to zero. A TDS meter lets you test both your input water and your filtered output so you can see the difference in real numbers.
HM Digital TDS-EZ (Budget TDS Meter)
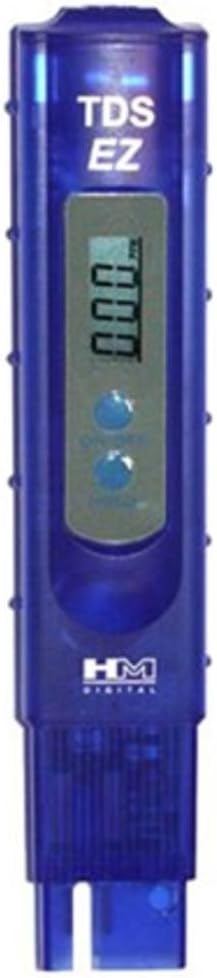
Simple, cheap, does the job. Dip it in a glass of water, get a reading in seconds. Measures 0-9990 ppm with 1 ppm resolution. Has an auto-off feature so you don’t kill the batteries. There’s even a little TDS reference chart on the back of the meter that explains what different ranges mean. This is really all you need if you just want to confirm your RO is working.
Price: About $18. Uses standard button cell batteries that last roughly 1,000 hours.
TDS + pH Combo Meter (Better Option)

If you want the full picture, get a meter that measures both TDS and pH. TDS tells you how much stuff is dissolved in the water. pH tells you how acidic or alkaline it is. This matters if you’re running a 5th or 6th stage remineralization filter on your RO system, because those stages are designed to raise the pH and add minerals back in. A combo meter lets you verify that stage is actually shifting your pH where you want it. Also useful for monitoring before vs. after: test your raw tap water, then test your RO output. Seeing those numbers side by side makes it very real.
Price: Around $13-20 depending on the model.
Remineralization Filters (5th/6th Stage Add-On)
If you run a 5 or 6 stage RO system, one of those stages is usually a remineralization filter. Its job is simple: add calcium, magnesium, and other minerals back into the water after the RO membrane strips everything out, and raise the pH from acidic (around 5-6) back up to a neutral or slightly alkaline range (7.5-8.5). I’ve tried several of these over the years. Here’s what I’ve landed on.
APEC PHPLUSKIT-14 (What I Keep Reordering)
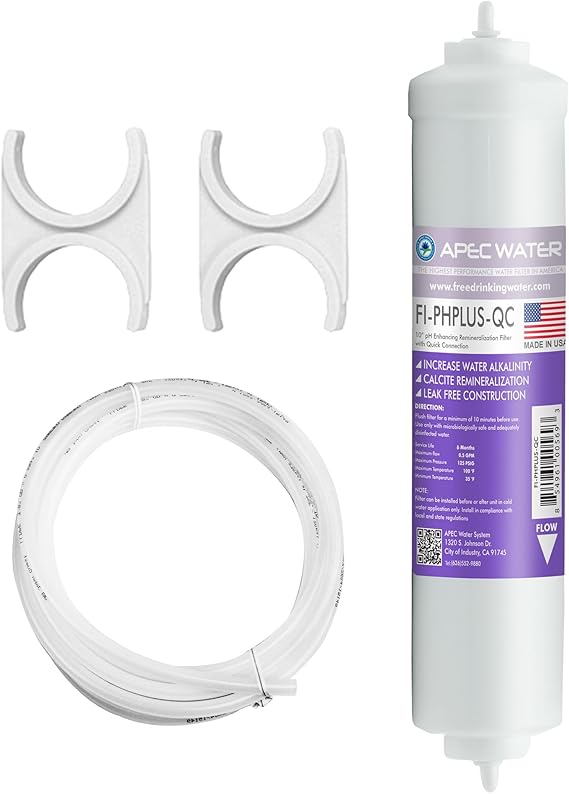
This is the APEC inline alkaline filter kit with 1/4″ quick connect fittings. US made. Calcium carbonate based. I’ve ordered this one more times than I can count at this point. It consistently brings my RO water pH up to the right range and the mineral taste is noticeably better than the cheaper alternatives I’ve tried. It’s not the cheapest option, but after experimenting with others I always end up back here.
Price: Around $46. Lasts about 6-12 months depending on usage.
iSpring FA15 (Budget Alternative)
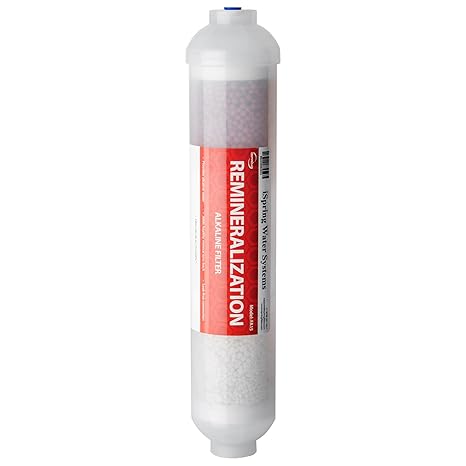
The iSpring alkaline filter uses mineral balls, calcite, and corosex to restore minerals and balance pH. NSF certified. 1/4″ quick connect. At around $22 it’s about half the price of the APEC. It works fine. The mineral restoration isn’t quite as consistent in my experience, and I’ve noticed the pH boost fades a bit faster toward the end of the filter’s life. But if budget is the priority, this does the job.
Price: Around $22. Same 6-12 month lifespan.
Geekpure Alkaline Inline Filter (Another Budget Option)
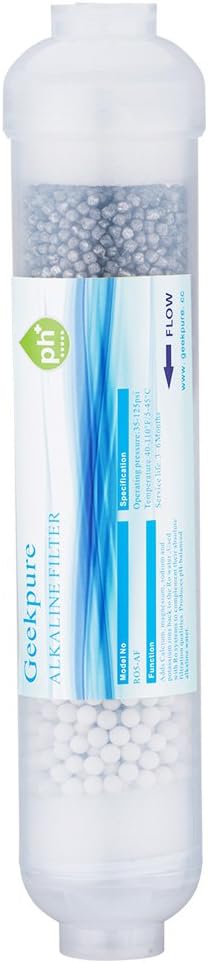
Similar concept to the iSpring. Polypropylene and calcium sulfite based, 1/4″ thread connection. Around $22-24. I used this one for a while before switching back to APEC. It works, pH adjustment is adequate, but the APEC just lasts longer and performs more consistently. If you can’t find the APEC in stock, the Geekpure is a solid fallback.
Price: Around $22-24.
Best Shower Filters
This is the part everybody forgets about. You’re standing in hot water for ten, fifteen minutes every morning. That hot chlorinated water is off-gassing (chlorine turns into chloroform vapor in hot steam, which is exactly as bad as it sounds). Meanwhile your skin is soaking it all up like a sponge. Ever had that tight, itchy, dry feeling after a shower and assumed it was your soap or your skin type? Could easily be the chlorine.
If you own your home, a whole-house carbon filter would take care of this for every faucet and shower. But renters? You need the workaround: an inline shower filter that screws between the shower arm and your shower head. I’m talking five minutes of work, no tools, nothing permanent. Your landlord doesn’t need to know or approve anything.
AquaBliss SF100 (What I Use)
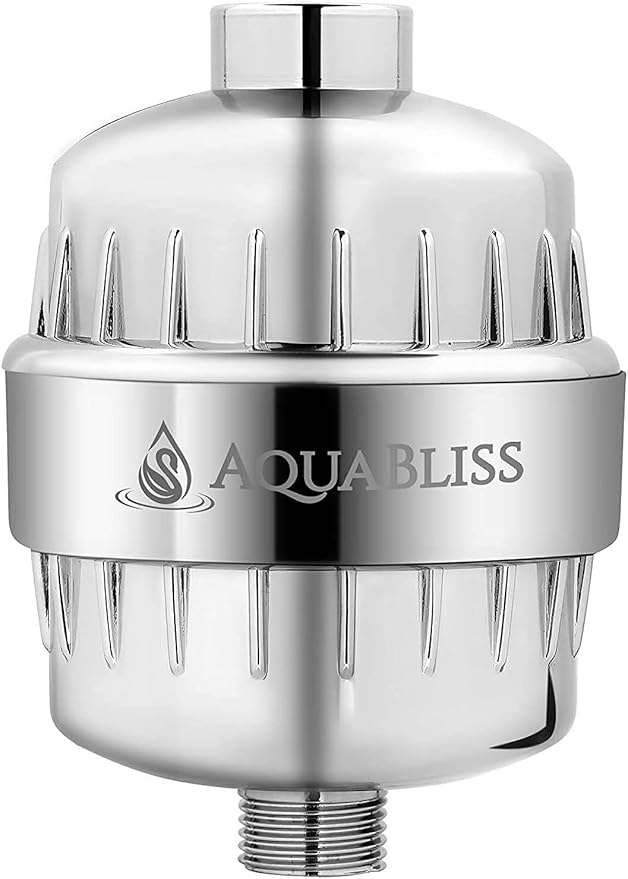
I’ve had this one on my shower for over a year and I’m not going back. It uses multiple filtration stages: a sediment screen, KDF-55 media (that’s a copper-zinc alloy that neutralizes chlorine and heavy metals through a redox reaction), calcium sulfite for extra chlorine removal, activated carbon, and a couple other layers. Standard 1/2 inch threads, so it fits basically any shower in the U.S.
Removes: Chlorine, heavy metals, sediment. Cuts down on bacteria and fungus too. It won’t touch fluoride (you need RO for that), but chlorine is the big concern for shower water anyway.
Price: About $31. Replacement cartridges are around $13 and they last roughly 6 months.
My take: Noticed the difference within about a week. My skin stopped feeling stripped after every shower. My hair was less dry. The chlorine smell in the bathroom just… went away. The filter doesn’t kill your water pressure either, which was my main worry going in. 60,000+ reviews on Amazon, 4.4 stars. There’s a reason it’s the top seller in the category.
AquaHomeGroup 20-Stage Luxury Shower Filter
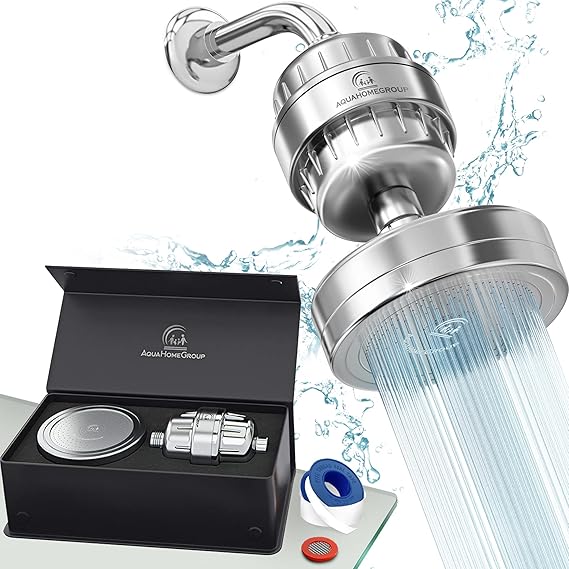
This one goes bigger. Instead of just an inline filter, it comes as a complete filtered shower head replacement. Twenty-plus filtration stages (vitamin C balls, KDF, activated carbon, ceramic balls, mineral stones, the works). You swap out your whole shower head for this unit.
Removes: Chlorine, chloramines, heavy metals, plus it helps with hard water mineral buildup. The vitamin C stage is the key differentiator here. If your city uses chloramine instead of chlorine (a lot of them have switched over), regular carbon filters don’t handle that well. The vitamin C media does.
Price: Around $50. Replacement cartridges are $15-20 and last about 6 months.
My take: Good option if your current shower head is due for a replacement anyway. Two birds, one stone. Especially worth looking at if your EWG report shows chloramine in your water, since that’s harder to filter with standard media. The AquaBliss handles chlorine great, but chloramine is a different beast.
My Setup at Home
Nothing fancy. RO system under the kitchen sink. AquaBliss on the shower. That’s it. Those are the two main entry points for contaminants: what goes down your throat and what soaks through your skin.
The RO handles fluoride, lead, PFAS, all the stuff I don’t want in my drinking or cooking water. The shower filter knocks out the chlorine so I’m not getting dried out and breathing in chemical vapor every morning. Total investment for both was under $250. Yearly upkeep is maybe $50-60 in replacement cartridges.
Now compare that to bottled water. A case of halfway decent water costs $5-8 at the store. If you’re going through four bottles a day, that’s $40-50 per month. Over a year, you’re north of $500, and you’re drinking out of plastic that may be leaching its own chemicals into the water (BPA, microplastics from the bottle material itself). The RO system paid for itself in about five months for me.
Common Questions
Do I really need to filter my shower water?
Short answer: yes. When chlorine hits hot water, it converts into chloroform gas. You’re breathing that in for the entire length of your shower. Your skin is also absorbing chlorine the whole time. A $30 filter fixes this completely. I noticed better skin and hair within the first week, and the chlorine smell in my bathroom disappeared.
Is RO water safe to drink? I heard it’s “too pure.”
I hear this one a lot. The concern is that RO water lacks minerals. Technically true. But the mineral content of tap water is tiny compared to what you get from actual food. A single banana has more potassium than a gallon of tap water. If it still concerns you, grab a remineralization cartridge. Most RO systems either include one or offer it as a cheap add-on.
Can I install an RO system in an apartment?
Absolutely. The under-sink models connect to your cold water line with a simple adapter. No drilling, no permanent changes to anything. When you move, disconnect it and take it with you. The tankless Waterdrop is especially good for apartments because it barely takes up any cabinet space.
What about Brita filters? Are they worthless?
They’re not totally useless. A Brita will improve the taste of your water by pulling out the chlorine flavor. But that’s about all it does. Fluoride, PFAS, lead, microplastics, pharmaceuticals? None of that. A Brita is a taste upgrade. An RO system is an actual health upgrade. Different categories entirely.
How do I know if my city adds fluoride?
Easiest way is the EWG Tap Water Database. Punch in your zip code and look for fluoride in the results. You can also call your local water utility directly and ask. About 73% of public water systems in the U.S. add fluoride. If yours does and you want it gone, reverse osmosis is your only real option at home.
How much water does an RO system waste?
The older tank-based systems waste roughly 3 gallons per 1 gallon of clean water produced. Not great. Newer tankless models like the Waterdrop G3P600 have cut that down to about 2:1, and some claim even closer to 1.5:1. If water waste bothers you, go tankless.
The Bottom Line
Don’t overcomplicate this. Go to EWG, look up your water. If the report shows fluoride, PFAS, lead, or anything else that makes you uneasy, get an RO system under your kitchen sink. It’ll take an afternoon to install and it costs less than a couple months of buying bottled water. Throw a shower filter on while you’re at it, because your skin absorbs more than you’d think.
Water is the thing most people skip because you can’t see the problem. The chlorine is invisible. The PFAS is tasteless. But it’s all there, in every glass. If you already went through the work of fixing your diet and cleaning up your kitchen, this is the logical next step. And honestly, it might be the easiest one.
What I Use (My Exact Setup)
People always ask, so here it is. Every product listed below is something I actually own and use regularly. No hypotheticals.
- RO System: APEC ROES-50. Ten years running, zero failures, zero leaks. Swap the 3 core filters once a year (~$40), RO membrane every 2-3 years. Cheapest clean water you’ll ever get.
- Remineralization Filter: APEC PHPLUSKIT-14. Goes inline as a 6th stage after the RO membrane. Brings the pH back up and adds minerals. I’ve tried the iSpring and Geekpure versions too. I keep coming back to this one.
- RV/Travel RO: SimPure T1-400UV. Built-in pump handles low water pressure situations. I use this in the RV. When I’m not using it full-time, the filters go in a plastic bag in the fridge so bacteria doesn’t grow in stagnant water.
- Shower Filter: AquaBliss SF100. Chlorine smell gone, skin stopped feeling stripped. $31 and five minutes to install. No brainer.
- Testing: HM Digital TDS-EZ for checking RO output, plus a TDS + pH combo meter for verifying the remineralization stage is doing its job. Under $40 total for both.
Ready to stop drinking unfiltered tap water?
Start with the EWG Tap Water Database to see what’s in your water. Then grab an RO system and a shower filter. Under $250 for both, and your body stops being the filter.
Clean water is just one piece. Make sure your cookware is equally clean, and that you’re cooking with oils that won’t undo your progress.
References:
[1] Choi AL, et al. “Developmental Fluoride Neurotoxicity: A Systematic Review and Meta-Analysis.” Environmental Health Perspectives, 2012/2019. PubMed
[2] Bashash M, et al. “Fluoride Exposure and Children’s IQ Scores: A Systematic Review and Meta-Analysis.” 2024. Analysis of 59 studies found IQ decrease of 1.63 points per 1 mg/L increase in urinary fluoride. PubMed
[3] Luke J. “Fluoride Deposition in the Aged Human Pineal Gland.” Caries Research, 2001. Found that the pineal gland accumulates fluoride at concentrations higher than bone. PubMed
